Introduction to OpenXR

Interested in building a Mixed Reality application that's properly cross-platform? How about one that can deploy to a HoloLens 2 in under 20 seconds? Maybe you're not interested in worrying about how much of your user's information Unity is collecting and selling, or you aren't keen on paying Unreal a chunk of your income? Writing MR applications yourself can be a daunting challenge! But it's one that's about to get much easier, thanks to OpenXR. With every major MR company backing OpenXR, this is a tool that's going to set the standard of MR development!
While many people will be able to simply hook into an existing engine's implementation of OpenXR, it's not all that hard to do it from scratch yourself! Here I'll show you a single code file that's about 700 lines of code, builds and deploys in seconds, and can run on Windows Mixed Reality headsets and the HoloLens 2 emulator! I'll be using C/C++, DirectX 11, and the OpenXR runtime that Microsoft recently shipped!
Not complex, but an excellent starting point!
If you just want to dive into the complete code, it's designed to be clear, and includes lots of comments! You can find it on Github here. If it doesn't compile right away, you may need to open the Visual Studio Installer and grab some of the C++ related workloads. It will also be helpful to have it open for context, but I'll link directly to a few functions, go into extra details for setup, and explain a couple of high-level concepts! You can find additional docs and samples on the Microsoft OpenXR page, and if you want an easier way to work directly with OpenXR, check out StereoKit, a C#/C MR library that I'm working on!
Setup
First, you'll need to make sure you have an OpenXR runtime installed on your device! For Windows, you can grab the Windows MR runtime on the Microsoft Store if it's not already present. And the HoloLens 2 emulator will have this pre-installed by default! If you have an Oculus Rift headset, or Quest + Link, you can turn on their preview runtime with a bit of fiddling, and this code will also work there. Same with SteamVR. And if you're running Linux, you may want to look into Monado, on open source OpenXR runtime for GNU/Linux that's also available right now, but for this post we'll be focusing on WMR.
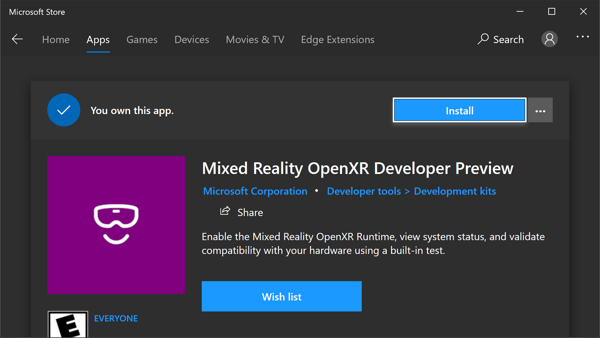
Install it, then open it, and enable it!
Next, we'll need a Visual Studio project to work in. An empty Win32 application will work just fine for desktop VR, but if you're also targeting the HoloLens 2, or HL 2 emulator, start with an Empty Windows Universal project and delete everything from it! (Note that HoloLens 2 emulator is x64, but the device itself is ARM64) DirectX should already be linked up, and if not, you may want to check your Visual Studio Installer setup, and download a recent Windows SDK.
When I first wrote this pose, you had to compile and link up OpenXR yourself, but they now provide a handy NuGet package that streamlines the setup process! I still compile OpenXR from scratch for StereoKit, but for most people, the simplicity of using the NuGet package is definitely worth it!
To add the NuGet package, go to [Project->Manage NuGet Packages] and under the Browse tab, search for OpenXR.Loader and install it to your project! As of this writing, I'm using version 1.0.6.2 of the NuGet package. There, super easy!
This hooks up .dlls .libs and headers for OpenXR, but we'll also need to link to a few DirectX libraries. For that, you could add them in your project properties, but I prefer to use #pragma directives instead! So at the top of the code, I do this:
#pragma comment(lib,"D3D11.lib")
#pragma comment(lib,"D3dcompiler.lib") // for shader compile
#pragma comment(lib,"Dxgi.lib") // for CreateDXGIFactory1
Application Overview
So this application isn't going to do anything too fancy. We'll start up an MR session, get ready for rendering with DirectX 11, let the user visualize where their palms are, and place some cubes in the scene! That's a pretty good starting point, and after that, anything else is just graphics and application code!
The basic structure of the application is:
-
Initializing DirectX
-
Initializing OpenXR with DirectX
-
Creating OpenXR input bindings
-
Create app rendering resources
-
Poll for OpenXR system events
-
Poll our OpenXR input bindings
-
Update our application logic
-
Render a frame
-
Update latency sensitive OpenXR input bindings
-
Update latency sensitive application logic
-
Setup render
-
Application render
-
Shutdown OpenXR
-
Shutdown DirectX
Initialization
During initialization, we start up DirectX and OpenXR, create input bindings with OpenXR, and then create assets for the app! DirectX initialization here is quite trivial, and the app asset creation is also pretty easy, but OpenXR initialization and input bindings are a little lengthy, and are the bulk of the application's code. Check out the openxr_init and openxr_make_actions functions!
I won't cover too much here since I've left detailed notes inline in the code file which are easier to maintain, but I'll make note of a few items of interest!
XrGraphicsBindingD3D11KHR binding =
    { XR_TYPE_GRAPHICS_BINDING_D3D11_KHR };
For example! All the Xr*Info types, and a few others like this one, have a 'header' at the top of their struct! The header consists of a XrStructureType that identifies its type, and a pointer to additional data. This is essentially a simple runtime type system that lets OpenXR accept unknown info structs, and convert them to into a struct they understand. You can see this where the D3D11 binding is getting passed into xrCreateSession, where sessionInfo.next is a void*.
XrGraphicsBindingD3D11KHR binding =
    { XR_TYPE_GRAPHICS_BINDING_D3D11_KHR };
binding.device = d3d_device;
XrSessionCreateInfo sessionInfo = { XR_TYPE_SESSION_CREATE_INFO };
sessionInfo.next     = &binding;
sessionInfo.systemId = xr_system_id;
xrCreateSession(xr_instance, &sessionInfo, &xr_session);
Also, a note on DirectX, since it's not a universal rendering solution! While DirectX isn't required for OpenXR, it's easy for me to work with. I've loved DX for a long time, and within Visual Studio, it's trivial to set up and find reliable documentation for! If you wanted to use OpenGL, Vulkan, DX 12, or whatever else instead, OpenXR does have you covered!
And check out openxr_make_actions for an example of creating inputs. OpenXR input could probably get a tutorial all to itself, it's a generic way to interact with a huge variety of different types of input devices, so it's pretty complicated, and delightfully robust! For customizing your inputs, check out the OpenXR specification for input paths.
Application Loop
Time is an interesting concept in Mixed Reality! Reducing latency is super important for preventing motion sickness, and one of the components for reducing latency it is predicting where a device will be in the future. Many devices track motion at a very high rate, IMUs in headsets and controllers often sample at well over 100 times a second, and this wealth of data can be used to predict where a sensor will be! At least in the short term, this can be a pretty excellent esitmate.
But this also means that you may need to treat your time a little more carefully! In OpenXR's input you can ask where a controller was, and where it will be within a short range of time from now. So when you get an input event like a button press, you can ask exactly where the conroller was at that moment in time! Similarly, you can draw your hand controllers at the position where they're predicted to be when the rendered image is finally available on-screen.
This code is called when a select action happens! Note that select_state has a timestamp, which we are passing in when asking for the hand pose! This ensures the hand pose we have is exactly where the action occurred.
XrSpaceLocation space_location = { XR_TYPE_SPACE_LOCATION };
XrResult        res            = xrLocateSpace(
    xr_input.handSpace[hand],
    xr_app_space,
    select_state.lastChangeTime,
    &space_location);

XrSpaceLocationFlags flags = space_location.locationFlags;
if (XR_UNQUALIFIED_SUCCESS(res) &&
    (flags & XR_SPACE_LOCATION_POSITION_VALID_BIT   ) != 0 &&
    (flags & XR_SPACE_LOCATION_ORIENTATION_VALID_BIT) != 0) {
    xr_input.handPose[hand] = space_location.pose;
}
This is why we have openxr_poll_actions, as well as openxr_poll_predicted. The regular poll will grab current or past input state for use in the app_update function. Predicted update is called during the rendering stage after predicted display time is provided, and we only use its results in app_update_predicted for adjusting the display location of items that can be predicted, like hands!
It's also worth remembering that since we're typically drawing stereo, we draw the screen multiple time from different vantage points! So a good idea is to either keep your draw code simple, or create a draw queue that would let you render it multiple times.
Shutdown
What gets initialized, must get shut down! See openxr_shutdown. I'll confess, I totally missed the OpenXR shutdown code for most of the time I was writing this post. Nothing bad happened with WMR, but forgetting this on Oculus Quest can quietly break subsequent runs! Just shut 'em down in reverse order, and that should be easy enough.
Wrapping Up
I've also been creating an open source C# MR rendering library called StereoKit, which uses OpenXR as its core interface to Mixed Reality. The current OpenXR implementation is largely based on the code you've seen here! So if you want to see how I use it there, check it out!
Using StereoKit and C# to display information from Bing Maps.
So, that's OpenXR! It's a surprisingly nice to read spec document, if you feel like digging further. The source I've provided should be a pretty solid starting point as well. There's also a bit of community here and there as well, like the Khronos Slack channel! So say hello, and lets make something cool!
Thanks for reading :)