Interactive GLSL - Lighting
-2018.3.5 4:30pm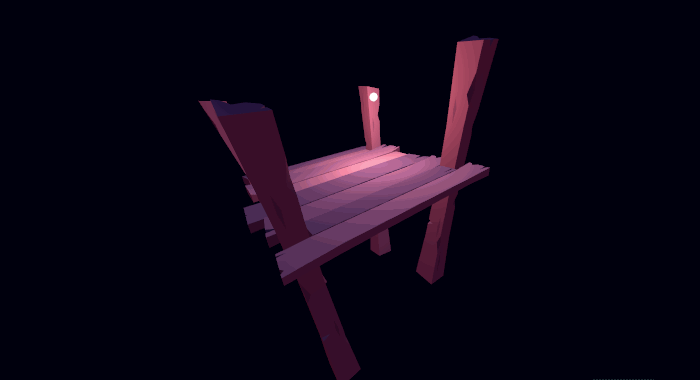
In this section, we'll mostly talk about lighting! I'm not much of a math person and I'll do my best not to botch terms, but that means I'll be talking mostly about visual results rather than in equations! So those of you who are also not math people may enjoy this :)
If you haven't read part one, be sure to do that first! I'll be assuming you know a bit about shader syntax and what's going on.
Lights
Lets dive right into light! There's a 2 different sources of light that we'll be using for illuminating our content today. The first is a simple "point light", a single, infinitely small source of light that comes from a single location! The second is a simplified concept of ambient light, or light that comes from indirect/bounced light in surrounding environment.
-We're not going to be talking about Physically Based Rendering here. It's a super math-ey topic, and I can't quite do it justice yet. However, these concepts are still at the core of PBR, so it's still a great place to begin!-
We'll start with point lights, and I like to begin my discussion of point lights with falloff/attenuation! Lets suffice it to say that falloff/attenuation by itself is pretty beautiful all on its own.
Light Attenuation
The core idea of light attenuation is that surfaces get darker as they get further from the light source. It's helpful to remember that light is just a whole lot of photons bouncing around, they don't degrade as they travel or anything, they just spread out a bit!
So lets imagine you're blowing some bubble gum! You have a single stick of bubble gum that you're trying to inflate, and as you blow the bubble gum, it gets thinner and thinner. Eventually, it gets so thin it creates a hole and pops!
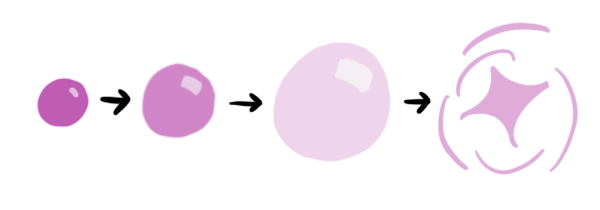
The surface area of a sphere is 4 * pi * radius2. It's a simple formula, but the important factor here is that it's exponential! As the bubble grows, it needs exponentially more gum to maintain an unbroken surface! This means the gum bubble gets thin extremely fast ...even faster if it clumps up like it always does =/
The attenuation of light is a very similar idea, only photons don't leave behind a sticky mess! As photons rush away from their source, they spread out further and further apart from each other. The thinner density of photons equate to a much darker surface! This is the essence of the Inverse Square Law!
And so we can use this easy formula for our attenuation :)
lightAttenuation = 1 / lightDistance2Check out the Fragment Shader in the example above! I have 4 different variations of attenuation formulas that account for different issues in game development. Take a look at the extra explanations in the comments, and try out each one by commenting out the old one, and uncommenting the new one!
I do want to mention the equation used for forcing a specific light radius. In the code, I called it a cutoff value, because that's exactly what it does -- cuts off the light at a certain distance! I also wanted to show you a graph of what that particular equation looks like, so you can see a little more visually what's happening there.
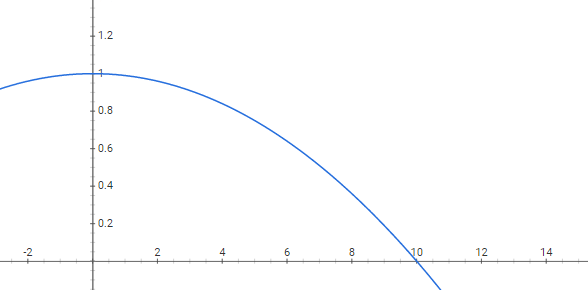
This is the graph of y = 1.0 - distance2/lightRadius2 using distance as x, and lightRadius as 10. The important characteristics of this graph are that at a distance of 0, you get a value of 1, and at a distance of 10, you get a value of 0! When you multiply that into the attenuation, you get the same or similar values close to the center of the light, but as you approach the radius, the attenuation gets forced to a flat zero as well. Note that this formula does go below zero, which is why the shader implmentation does a max(cutoff, 0) to prevent negative light!
The cutoff equation is purely creative with no basis in reality, so it's fine to mix it up to get something different! Perhaps a higher exponent to preserve the original attenuation better towards the center, but with a harsher edge ( 1.0 - distance3/lightRadius3). Or even a linear formula, for a really smooth looking edge, but preserving less of the original attenuation value! ( 1.0 - distance/lightRadius )
N dot L - Lambertian Shading
The next part of our point light is how it interacts with the angle of the surface! Attenuation by itself may be quite visually smooth and attractive, but real life looks a little different.
Intuitively, you'll probably know that as you tilt something away from a light source, it'll get darker! A surface directly perpendicular to a light source will be significantly brighter than a surface parallel to a light source, so lets explore that!
Imagine you're holding a big sheet of cardboard. Or even better yet, one of those poster assignments you had to do for class back in high-school! Then you walk outside, and SURPRISE! It's windy! Oh boy!
Now if you hold that poster assignment boldly into the wind, directly perpendicular to it, you get the full force of nature pushing against you! This is because you've maximized the amount of wind that can interact with your surface! And more wind means more force.
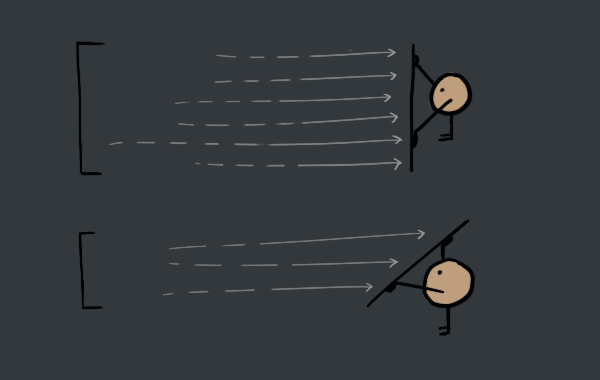
But as you tilt yourself to the side, the force of the wind lessens. Ideally, you can even hold the poster completely parallel to the wind, in which case the wind's force vanishes entirely. You've reduced the amount of wind that can interact with your poster, so much less force is applied!
Now imagine this wind is actually photons, and the poster is your triangle! The more perpendicular the surface is, the more photons can brighten up your surface! And as the triangle becomes more parallel and fewer photons can interact with it, it also becomes darker.
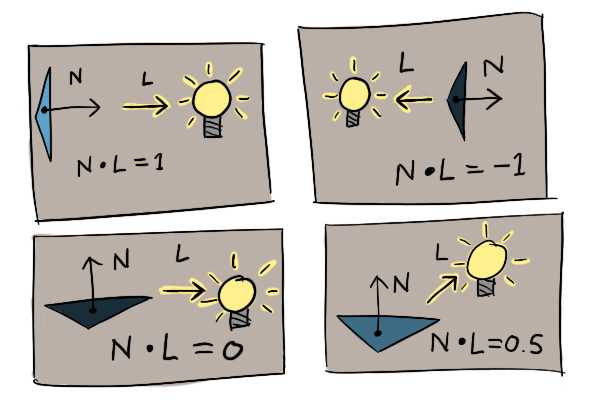
So this brings us to the N dot L formula! Also known as Lambertian Shading. I won't dig into the mathematical foundation for this, but I'll try to do a high level overview of how it works!
The dot product has a whole collection of useful purposes, but right now we're going to focus on the dot product's ability to measure how similar two directions are! If you have two direction vectors that are a length of one, the the dot product will tell you how much they face the same direction as a value between -1 and 1. So, two direction vectors that point exactly the same direction will have a value of 1, and two direction vectors facing directly away from each other will be -1! It's a pretty predictable gradient of values in between, with the dot product of perpendicular vectors being 0.
Another use for the dot product is the half-plane test! You can use it in cases like AI to check if the player is in front of, or behind an AI. You take a dot product of the AI's direction vector and the vector from the AI to the player, if it's positive, the AI can see the player! If it's negative, the player is behind the AI.
Alright, awesome! So if we use the direction facing towards the light as one vector, and the direction the triangle is facing as another vector, then we can use the dot product to see how much the triangle faces the light! We'll get a 1 if they're the same direction, and a value of 0 or less if the triangle is parallel or facing away.
faceBrightness = max(0, faceNormal (N) dot lightDirection (L))This can easily be combined with the attenuation from earlier by multiplying them together:
pointLightIntensity = lightAttenuation * faceBrightnessAmbient
Alright, that's pretty cool! We've got a super moody awesome point light going on, but what if we don't want it to be quite so moody? Right now, our point light is bright on one side, but deep, dark, soulless black on the other! You may have guessed it, or you may have simply read the section heading! But we're going to solve this with ambient lighting :)
Now, ambient/indirect lighting is a super complicated topic that the latest and greatest engines have been racing to perfect for a long time. But there's an extremely simple approximation that people have used since the beginning! They just added a solid flat color to EVERYTHING, and called it a day. Woah. It's that simple? Yeah.
Of course, there's a lot of alternative methods, and some of them are still pretty simple too! You could use two ambient colors, sky and ground, and blend between them based on the face normal's y value. Or you could use a blurry cubemap, and sample from that using the face normal! These methods are generally dirt cheap, and while they may not stack up to some of the more recent algorithms, they can quite often be more than enough!
There's some code in the example for two-color ambient as well, so check that out! But I don't have a good cube-map setup to show you that today. Also note that since ambient light is a separate light source from our point lights, you can find the ambient code in the GetLight function!
More
So that was long! And I didn't even get to specular lighting! Anyhow, hopefully this has been helpful regardless. Lighting can be a pretty math-ey and intimidating subject, so I've tried my best to distill it into an easily consumable format.
I love to write about shaders, so I'm sure I'll write more in this vein later on! This is the extent of what I wanted to cover for this short series. If you have any questions, suggestions, or comments, definitely let me know :) And if you enjoyed reading it, please share it with a friend, or just let me know it helped you out! Thanks for reading!
Keep updated!
Games! Tools! Tutorials! Don't miss anything, and feel free to drop me a note, I'd love to hear from you!